

Applicable to-
SQL Server 2022 on-prem on Windows and Linux and SQL Server 2022 hosted on Windows Virtual Machines.
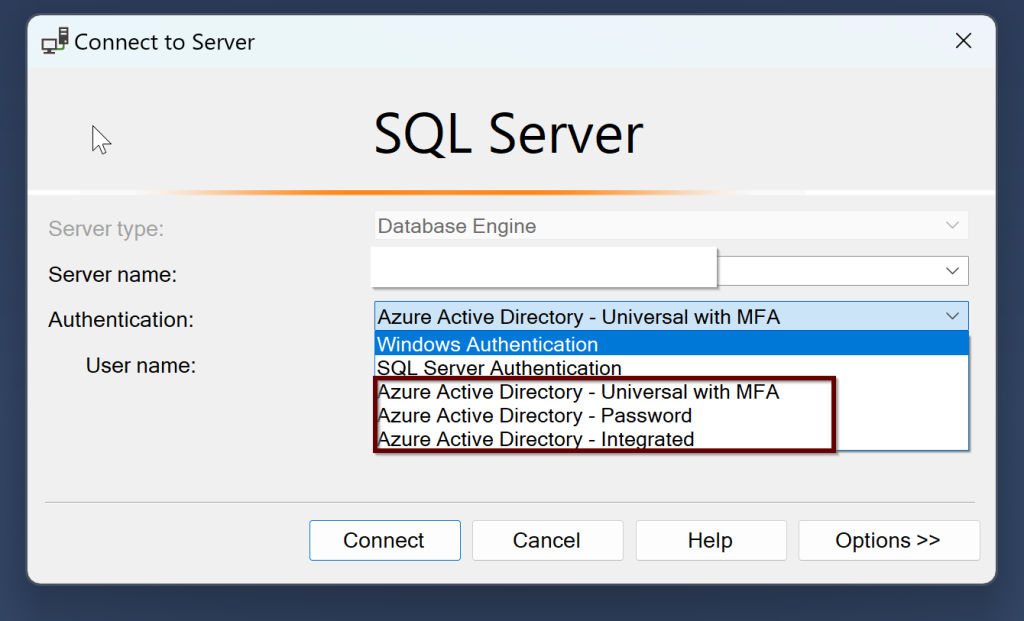
Once you install the SQL Server, there are three different authentication methods that you can use to connect SQL Server along with the Windows and SQL Server authentication. They are –
- Azure Active Directory Universal with Multi-Factor Authentication
- Azure Active Directory Password
- Azure Active Directory Integrated
If you join the Windows Server Active Directory and Azure Active Directory, then you can use both the Windows login and Azure AD login to SQL Server.
Remember: To connect your SQL Server to Azure AD, your SQL Server and the host that runs the SQL Server should be registered in Azure Arc. If you have not already connected your SQL Server to Azure Arc, here is a step-by-step guide to do.
The user that is used to set up the Azure AD should have the contributor role for the server and on the Keyvault.
Prerequisites:
When installing the SQL Server 2022, the extended functionality in Azure will automatically install the Certificate that is stored in the Key Vault and Azure AD application automatically as we create the Azure AD admin for SQL Server.
- Setup Azure AD admin
The account that is being used to create the Azure AD admin account must be in the contributor role for the KeyVault and for the Server as well from the Azure Arc.
Permissions are shown under the Access control (IAM) under the KeyVault

Permissions as shown under the Access control (IAM) under the SQL Server-Azure Arc

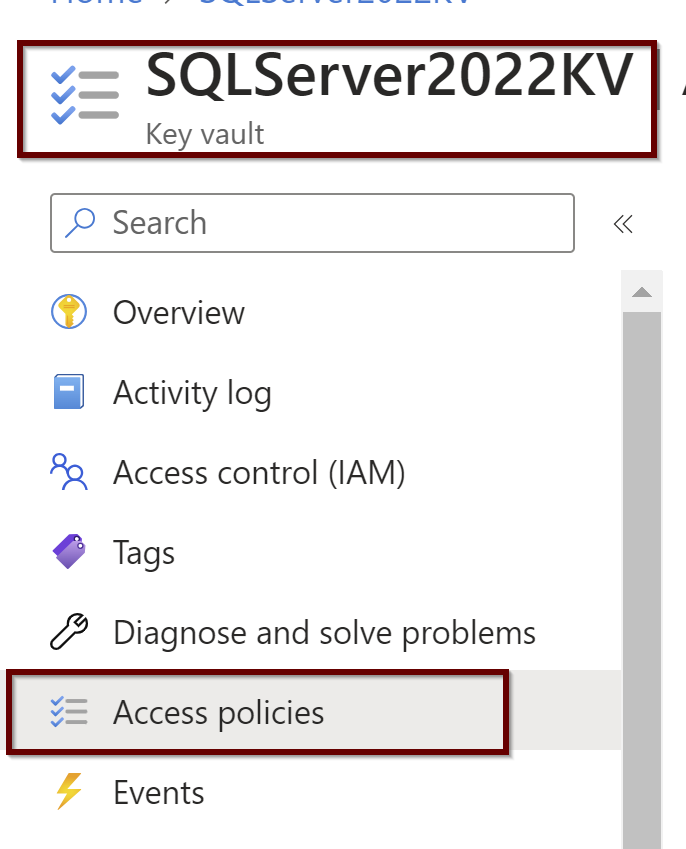
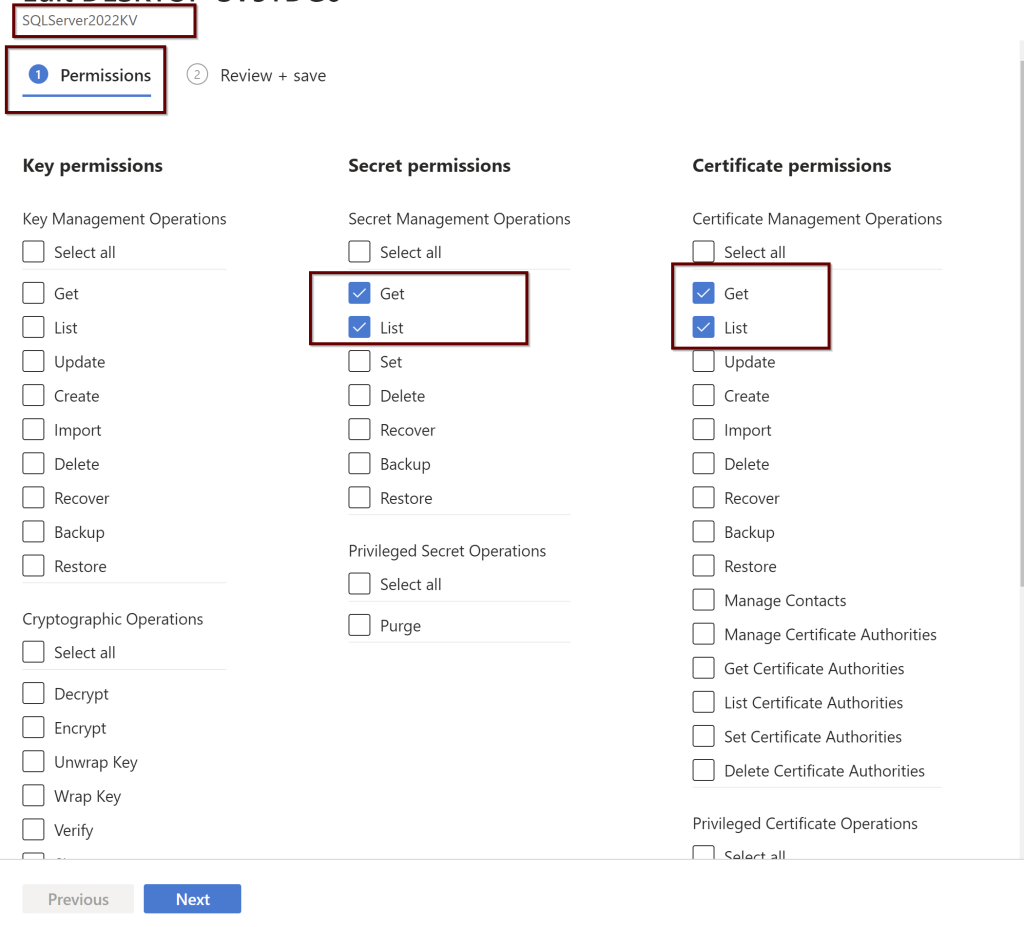
Setting up the Access Policies under the KeyVault
Under the Key vault, select the permissions as shown below. You will find these under the Access policies within the KeyVault
Setting up the Access Policies under the Azure AD users
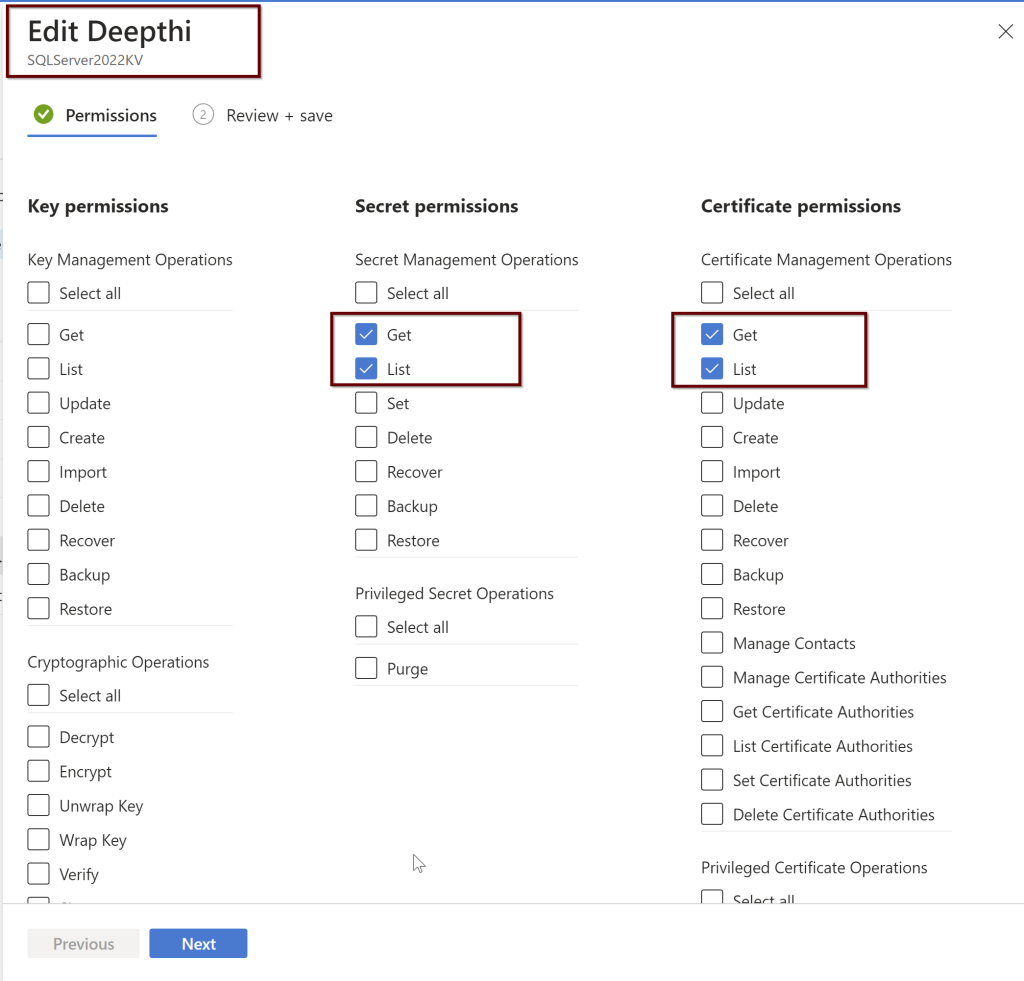

While setting up the Azure AD admin, portal functionality will automatically create the Key vault certificate and the Azure AD application registration but you can also manually create your own certificate and also setup the Azure AD application registration.
You can create the Azure AD admin user using the portal/PowerShell/Azure CLI/ARM template. If you are creating using the ARM template then you need to create the Key vault certificate and Azure AD application before setting up the Azure admin.
Azure AD admin setup for SQL Server
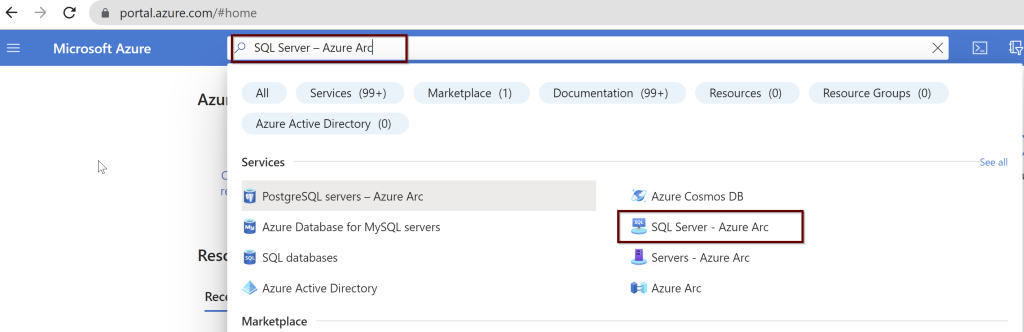
In the Azure portal, search for “SQL Server – Azure Arc” and select it from the services listed.
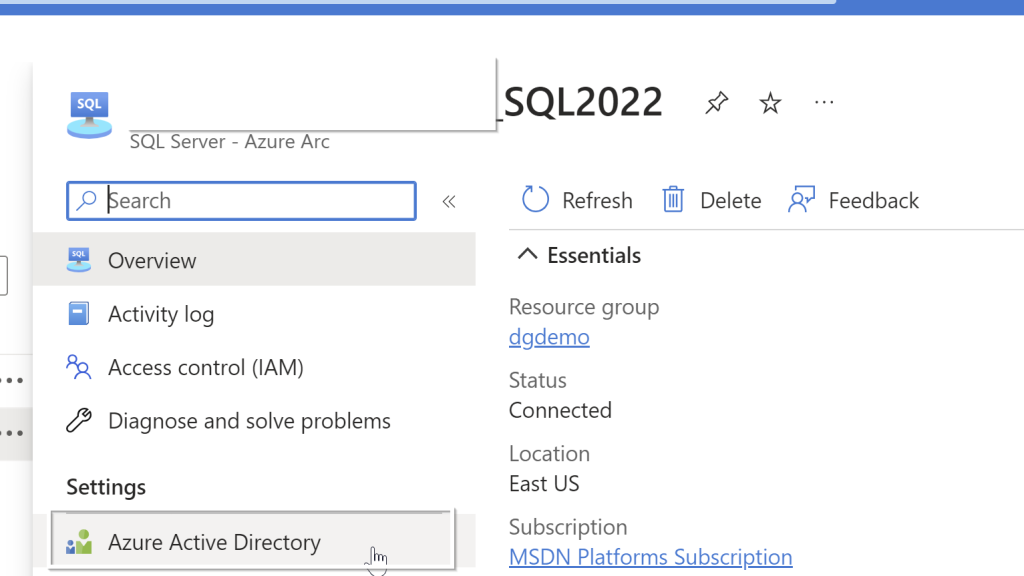
Choose the Azure Arc SQL Servers registered. Select the Active Directory from the left side pane.
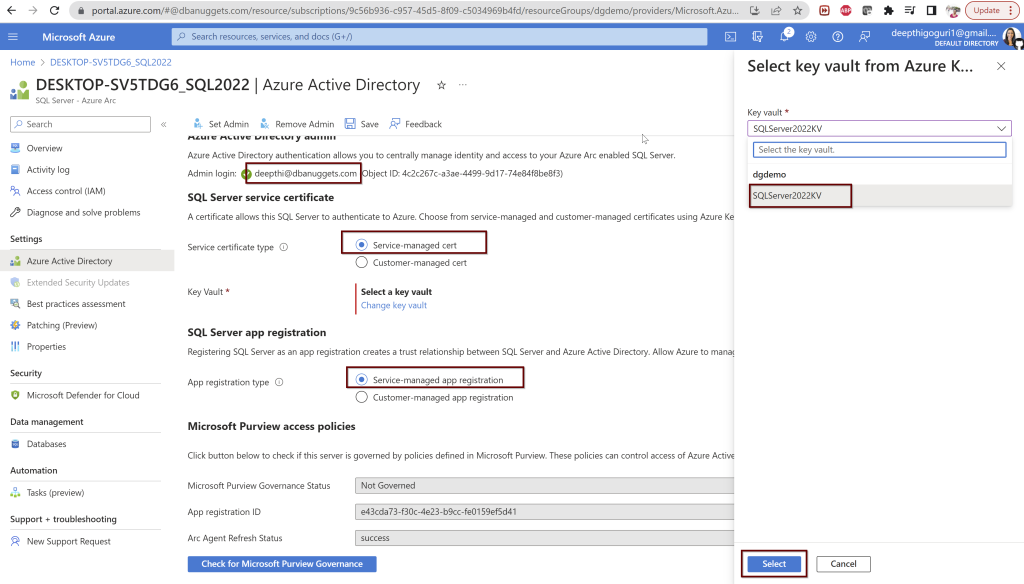
Select the user you want to use and select the Service-managed cert and Service-managed app registration. For the key vault, select the key vault and click select. Once you choose these options, click on Save at the top. If you followed all the steps correctly from the beginning, you should not see any errors.
During this process, a call is sent to the Azure Arc agent which will then configure the Azure AD authentication for your specific SQL Server instance. This process will take a couple of minutes to complete.
So while this process is going on, there are certain things that will happen automatically behind the scenes.
- The certificate is created in the key vault you selected with the name format hostname-instancename-uniquenumber as shown below

The Azure AD application is created with the name in the format of hostname-instancename-uniquenumber as shown below.

The necessary permissions also will be granted to this application automatically. To see what permissions are provided, please look for the steps below:
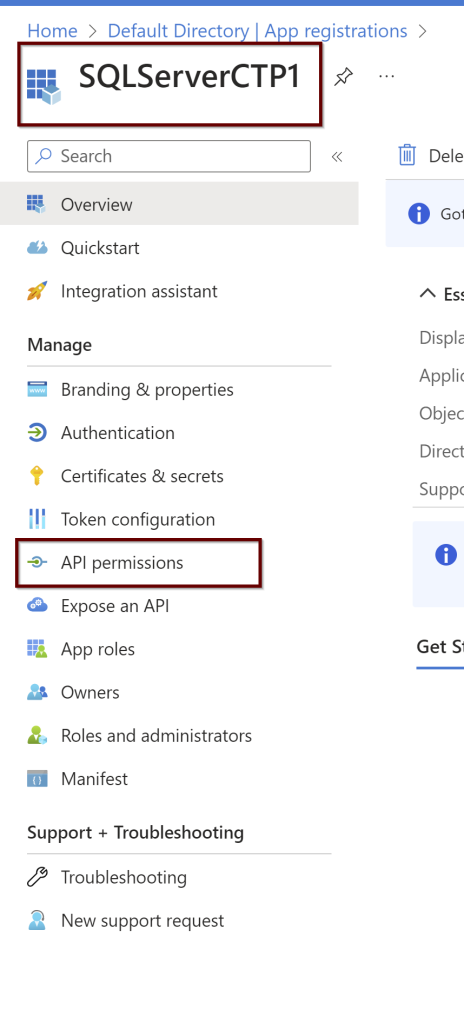
Open the application (here, I am using the manually created application name SQLServerCTP1. Once you open the application, in the left side pane click on API permissions.
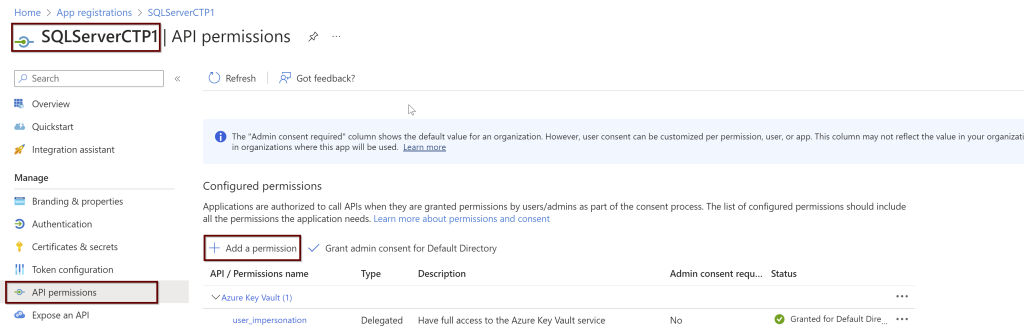
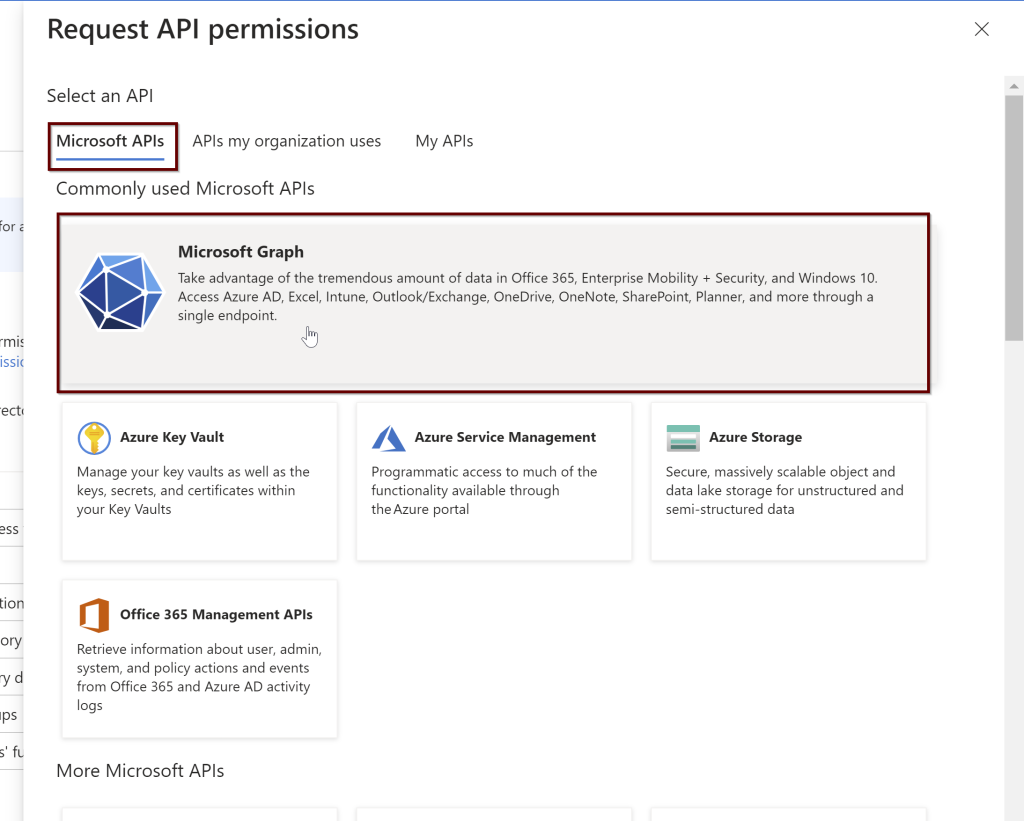
Click on the Microsoft Graph and request API permissions (see a couple of screenshots below)
3. Then the certificate from the Azure Key Vault is assigned to the application and saves all of these settings to Azure Arc.
Remember: The certificate created automatically is not managed and rotated by Microsoft. It is up to the customer to manage the certificate. For that reason, we can also create our own certificate along with the application for Azure AD admin setup. Follow the below steps to create your own certificate and application.
According to Microsoft docs, Steps that need to install Azure AD to connect to SQL Server are:
- Create and register an Azure AD application and Grant permissions to the Azure AD application
- Create and assign a certificate
- Configure Azure AD authentication for SQL Server through the Azure portal
- Create logins and users
- Connect with a supported authentication method
- Create and register an Azure AD application
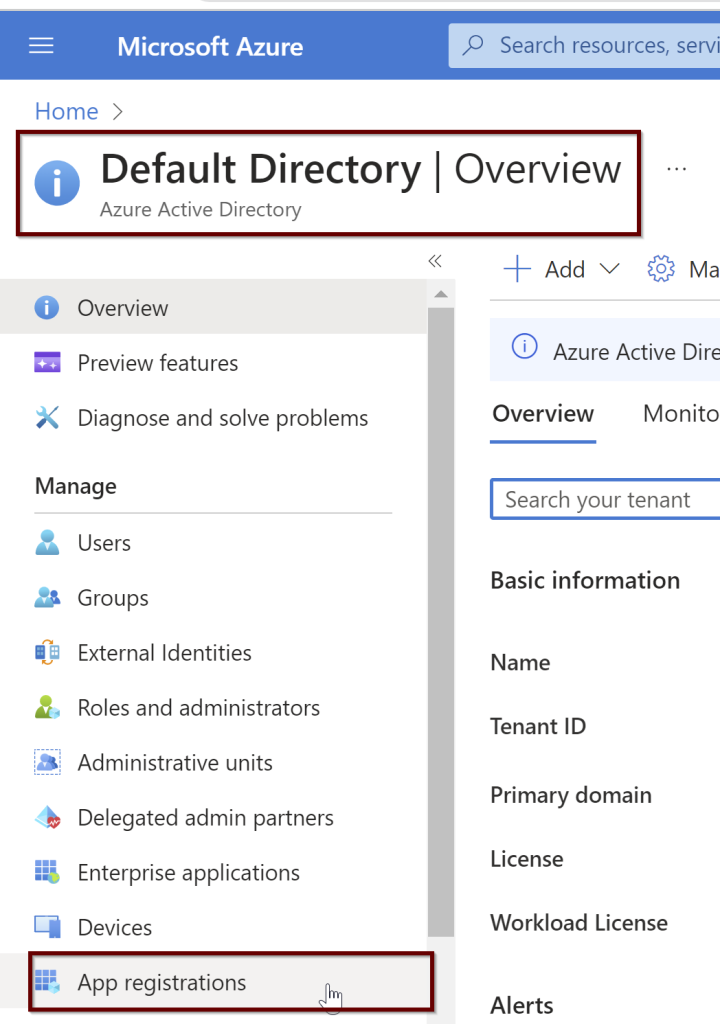
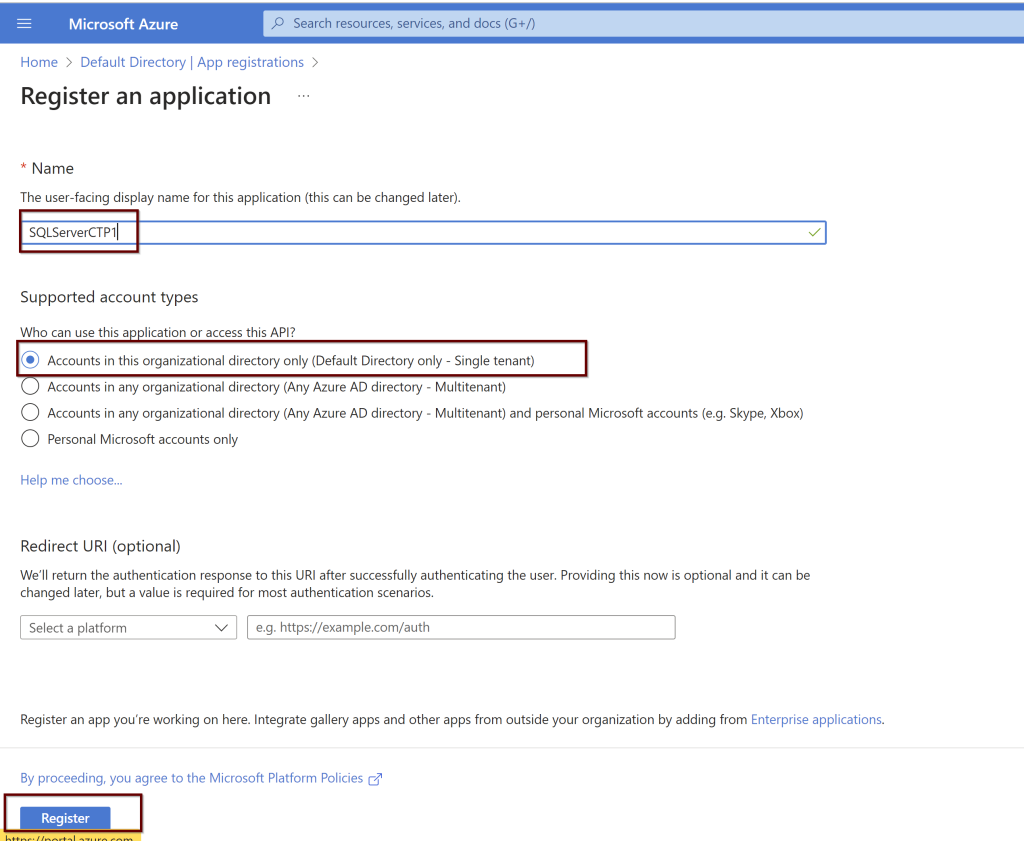
In the Azure portal search bar, search for Azure Active Directory and then choose App Registrations from the left pane. Then click on New registration


Go to the application. On the left side pane, click on the API permissions.
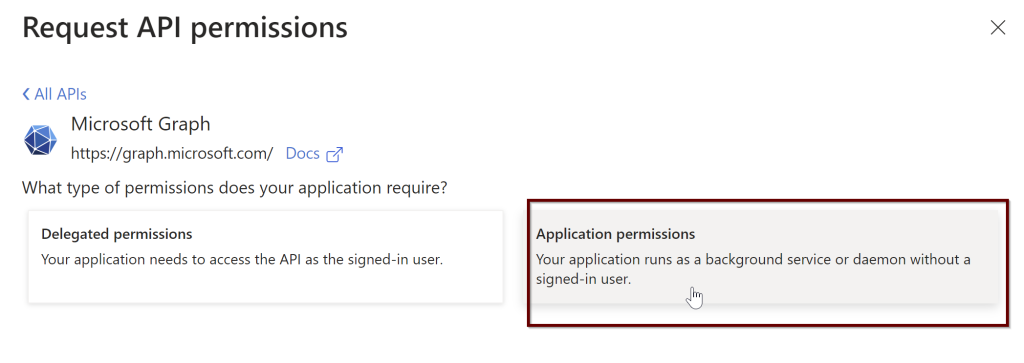
Next, give all the permissions needed for the application. Select the Microsoft Graph
Click on the application permissions
In the search bar, select the Directory.Read.All and select the permission and click on add permissions.

Follow the same steps again. Go to the application> left side pane select API permissions> Microsoft Graph> Delegated permissions
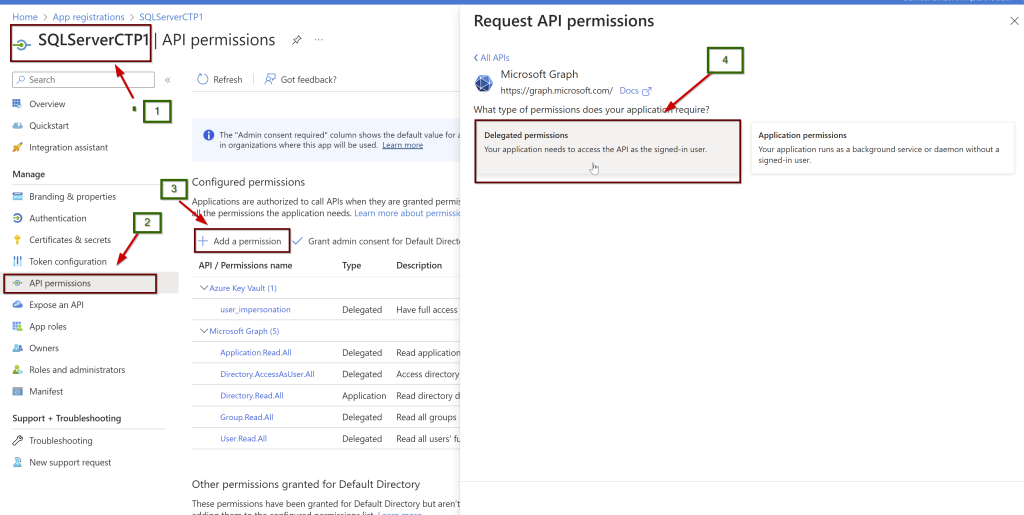
Select all these and grant admin consent. As per the Microsoft doc, the user that giving the permissions should be a part of Azure AD Global Administrator or Privileged Role Administrator.
- Application.Read.All
- Directory.AccessAsUser.All
- Group.Read.All
- User.Read.All

2. Create and assign the Certificate
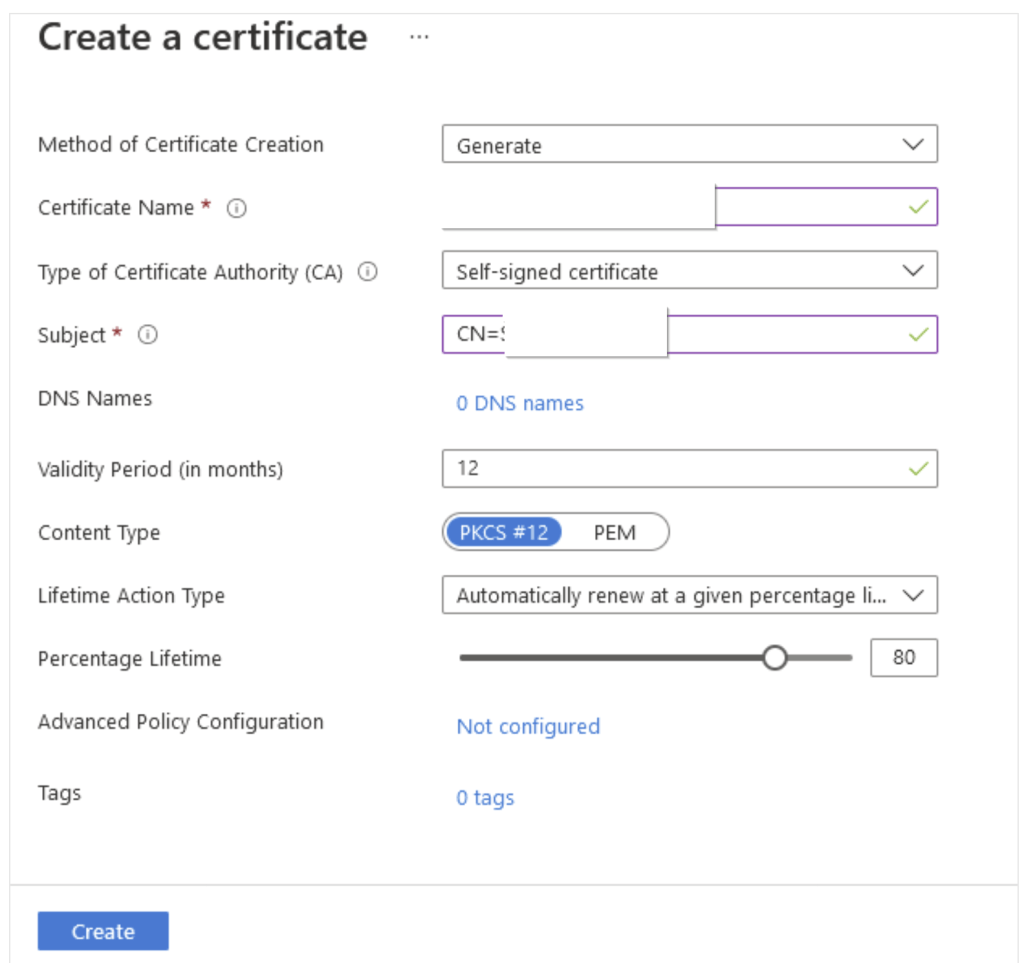
Go to the Key Vault account if you have it ready to place the certificate. If you don’t have one, create one. Here I already have it.

Click on Generate/import > Give the certificate name. Check for the validity period and by default it is 12 months which is recommended. rest all the options as is as per default values and click Create.
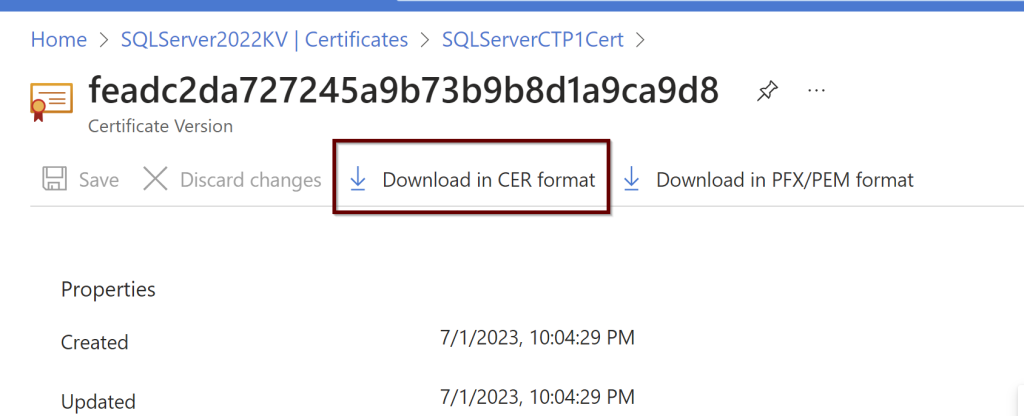
Click on the certificate later to see if it shows online. If it doesn’t please refresh the page to see it online. Download the CER format of the certificate. You need this download to upload to the certifications under the application.
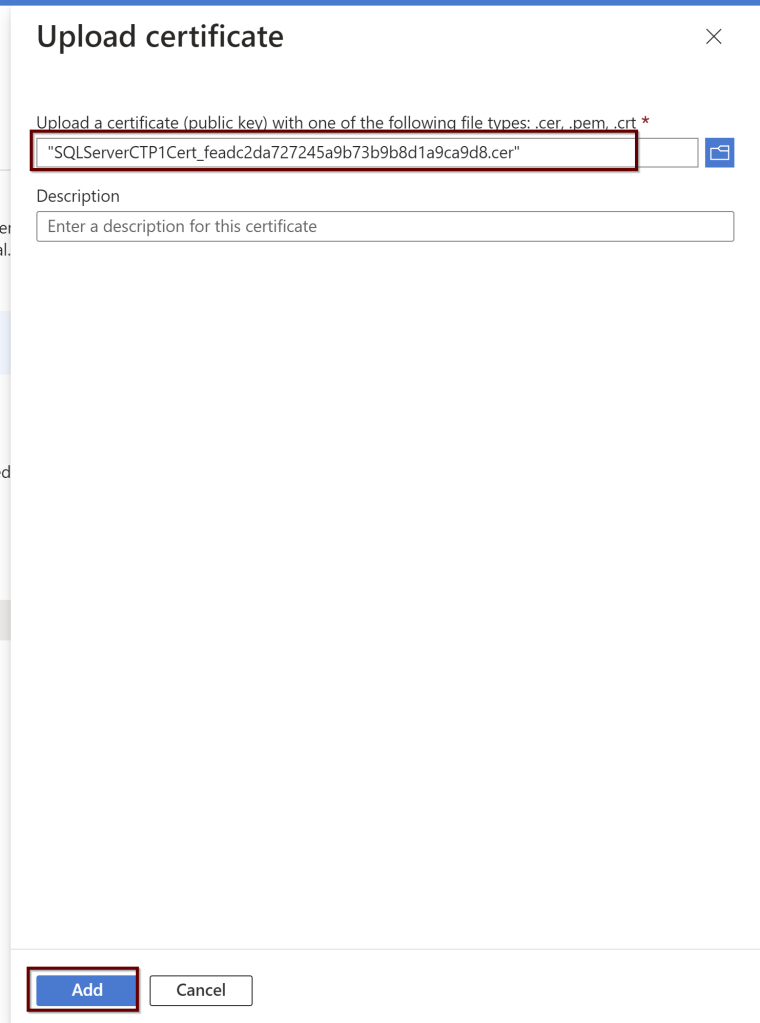
Go to the application that was registered page. On the left pane, click on the certificates and secrets. Under the Certificates click on upload
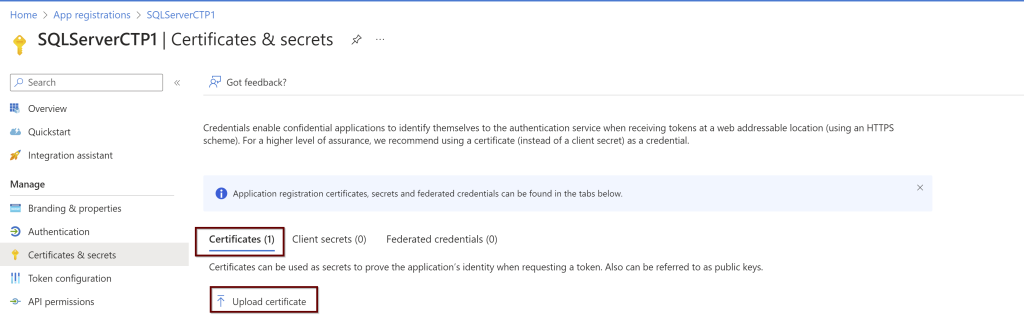
Upload the certificate from the downloaded location and click on add.
Next, go to the key vault where the certificate is saved to provide the permissions. Add Access Policies.
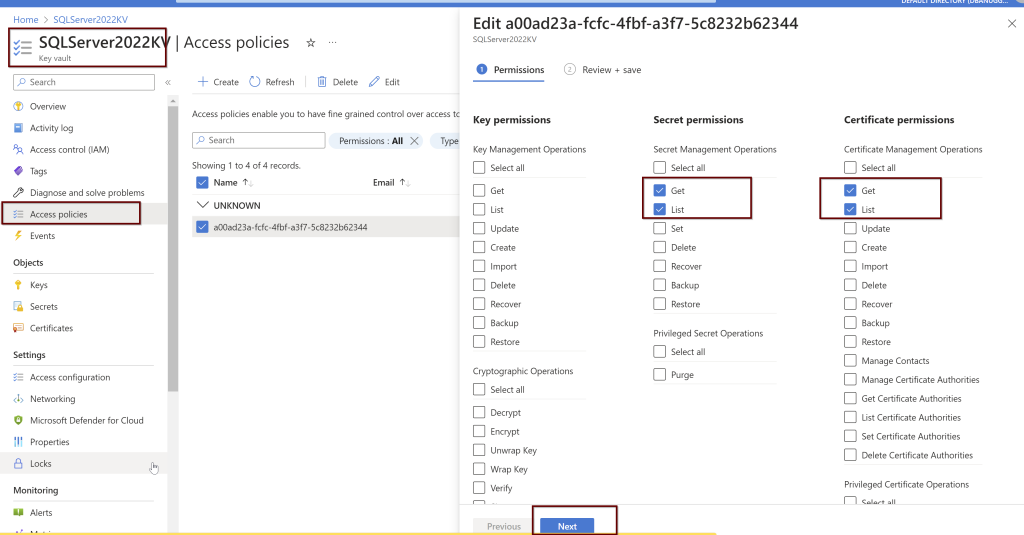
Click on the principal>give the computer name>click next> review and create.

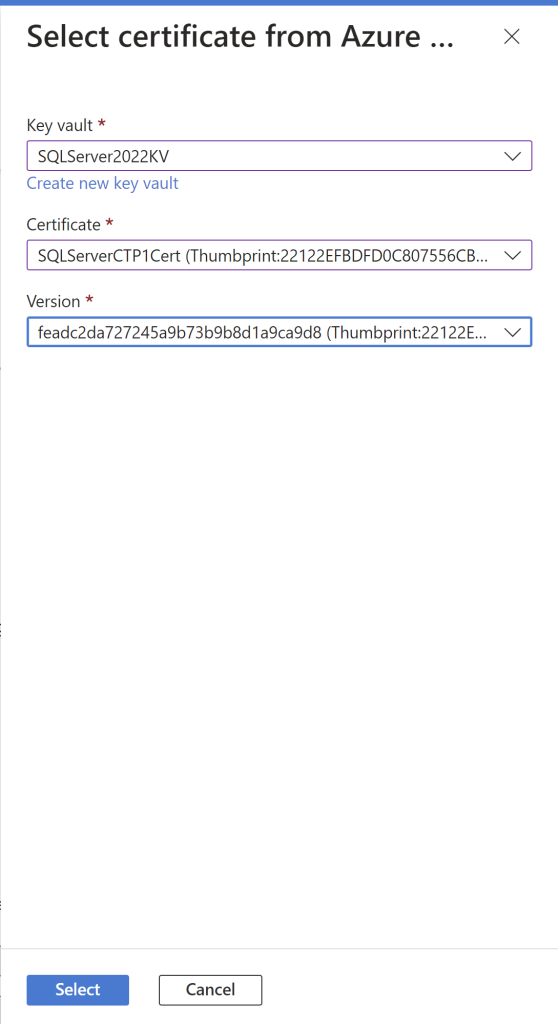
3. Configure Azure AD authentication for SQL Server by creating the Custom-managed Cert
Click on the SQL Sevrer instance linked to the Azure Arc for SQL Server> go to the active directory>click on set admin>
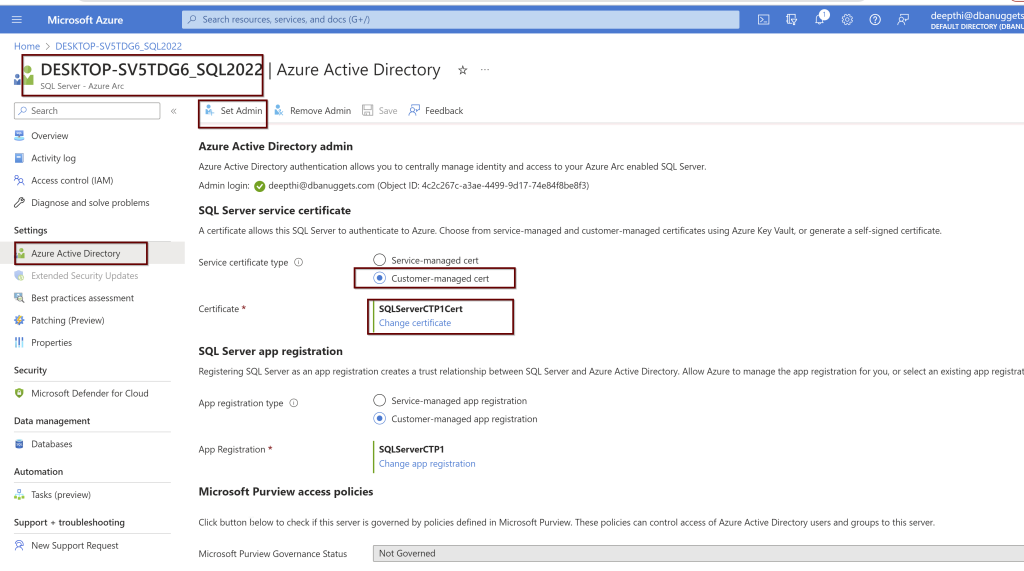
Select the Customer-managed cert and chose the certification. From the drop-down menu, you will see all the details. Choose the appropriate ones and click select.
In the same way, you will also choose the SQL Server app registration.
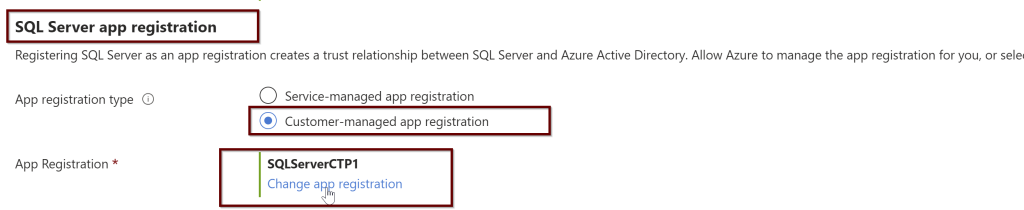
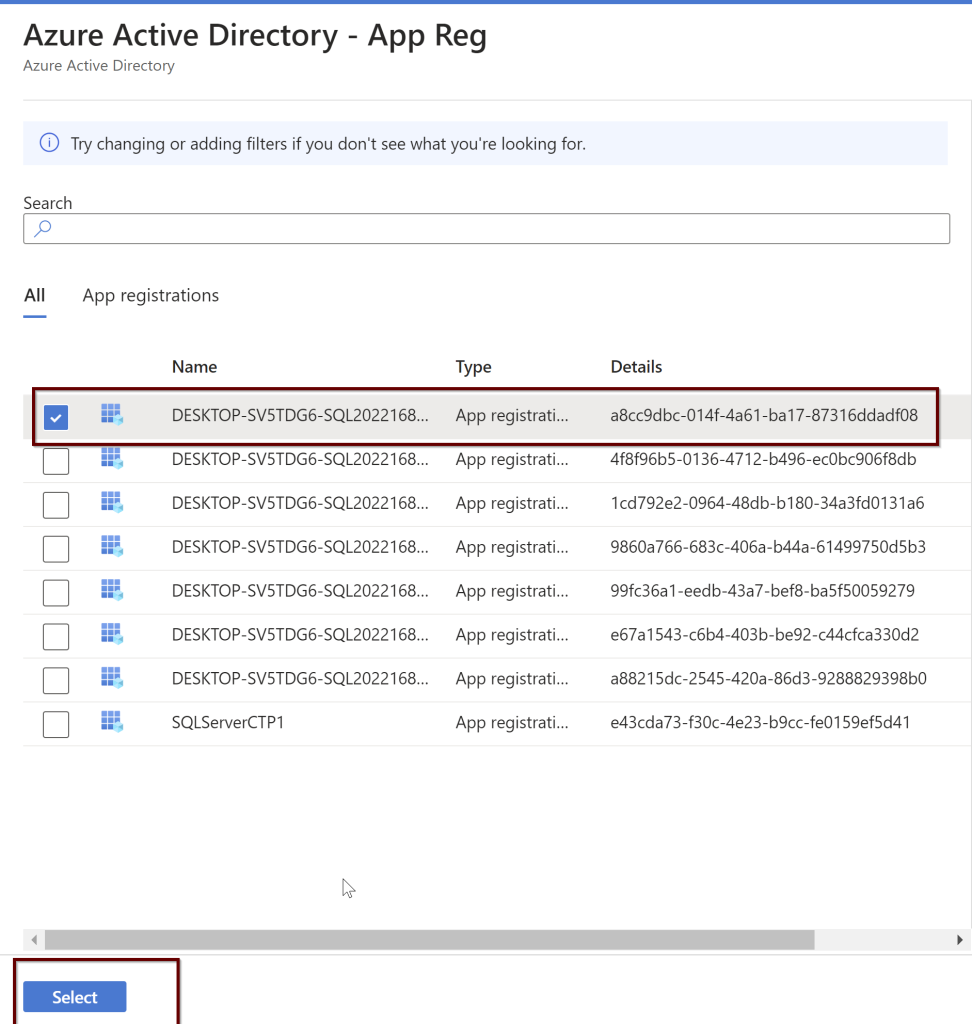
Select the app registration>select app registration>select the app>select
After you have selected it, click on the save button at the top

You should be able to see the login in the sql.server_principles on the server but it is not sysadmin yet.
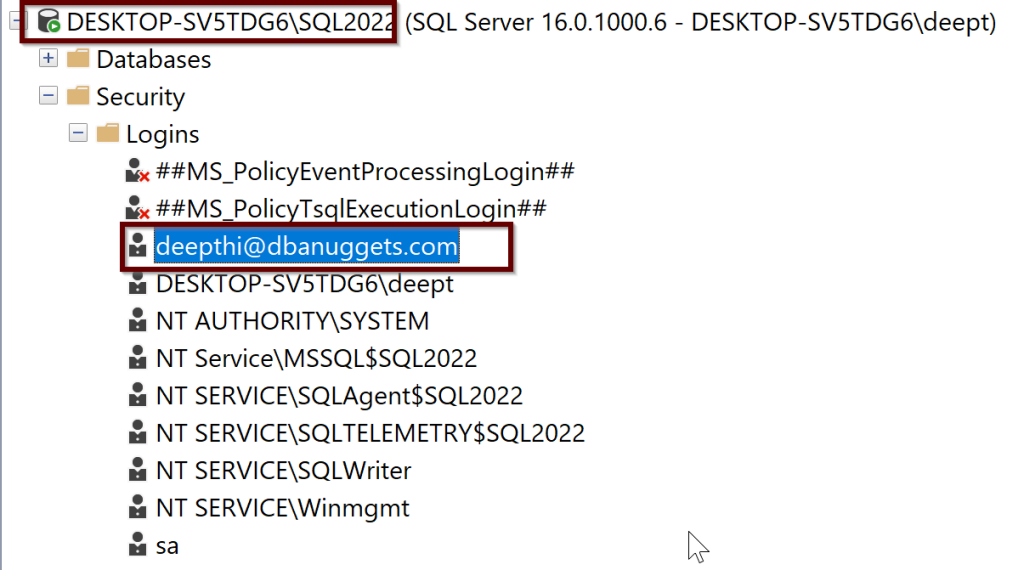
You can either give the sysadmin permissions through GUI in ssms tool or you can use the below script. Here I am using my email credentials but you can replace that with your AD admin user email credentials.
ALTER SERVER ROLE sysadmin ADD MEMBER [deepthi@dbanuggets.com]
GO
4. Create logins
Once you give the sysadmin permissions to this account, it can go ahead and create any number of Azure AD logins. For example, I took some examples from Microsoft docs.
-- login creation for Azure AD user
CREATE LOGIN [user@contoso.com] FROM EXTERNAL PROVIDER;
GO
-- login creation for Azure AD group
CREATE LOGIN [my_group_name] FROM EXTERNAL PROVIDER;
GO
-- login creation for Azure AD application
CREATE LOGIN [my_app_name] FROM EXTERNAL PROVIDER;
GO
5. Connect with a supported authentication method
You can try to log in now using the Azure AD authentication from ssms tool shown below:
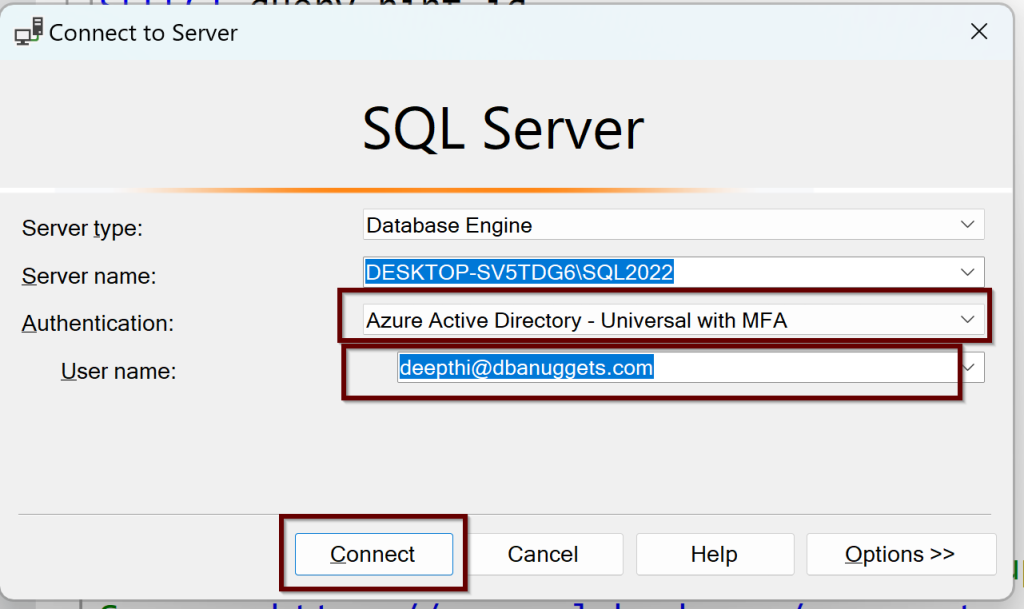
With the multi-factor authentication, you will need to login into Azure and you will be connected to SQL Server 2022 with an Azure AD admin login.

Summary
In this blog post, you have learned how to Create an Azure AD Authentication connecting to SQL Server 2022. We have seen creating the Certificate and the application automatically by Azure to add Azure AD admin to SQL Server but also we have learned how to manually create the Certificate in Key Vault and create an application as we try to add Azure AD admin to SQL Server 2022. Finally, we were able to connect to the SQL Server by using the Azure AD authentication using ssms tool.
References
- Azure Active Directory authentication for SQL Server
- Set up Azure Active Directory authentication for SQL Server
- Using automation to set up the Azure Active Directory admin for SQL Server
Thank you for reading!
